A while ago I wrote about multiple exposures and particularly about multiple exposure while winding film and panning or moving the camera. I promised I would explain the principle of the slitscan and how this evolves from the multiple exposure device. You may want to read the previous post at http://cameramods.blogspot.com/2011/07/from-multiple-exposures-to-slitscans.html before going any further with this one.
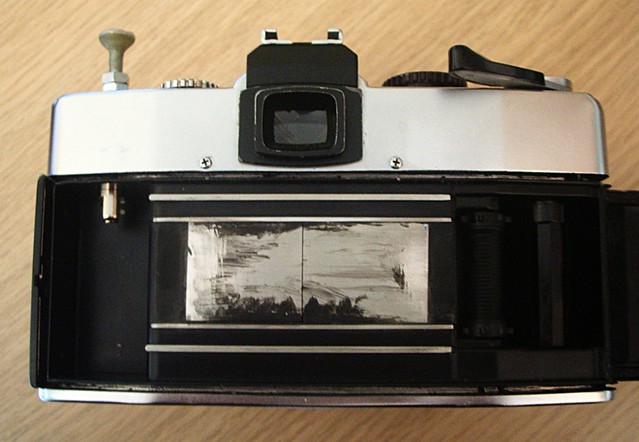
To start with, take a camera which can take very long narrow images. The way I do this is I glue cardboard or metal directly onto the focal plane, just in front of the film, to stop light getting to any part of the film except the thin slit in question. A picture of a modified camera was on the previous post where it was pointed out that simple inexpensive point-and-click 120 film cameras are ideal.
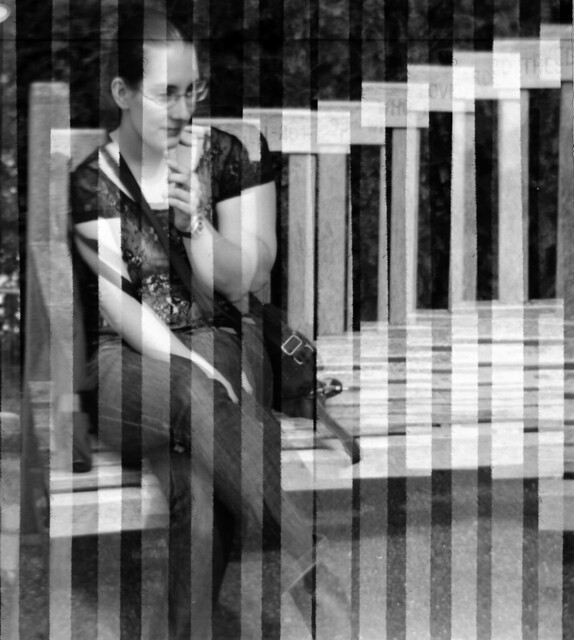
With some practice, pointing the camera and winding on the film at coordinated rates, such a camera can produce pictures that are rather representational, because the panning and the winding on are both about the same amount.
A slitscan camera
If it wasn't for those nasty hard lines and rather clunky appearance this is almost a normal picture taken in a different way. Well how do we get rid on the lines? The idea is to arrange that the "slit" gets narrower and narrower until it is only a few pixels or so wide and the film is wound on smoothly past the slit by some mechanism. This is actually not too difficult to arrange. Here is a normal 35mm camera with a slit added
The process is likened to a flatbed computer scanner: this can only "see" a thin line at a time but with the line moving it can actually put together quite complex images. In fact flatbed scanners have been converted to slitscan cameras too, but not by me. Not yet at least.
My preferred material to build these slits is the metal from an aluminium drinks can. This can actually be cut quite accurately with a sharp knife and steel rule. The technique is to cut the metal to size and then cut it in half, and it's important to ensure that you don't swap or turn over either piece after it's cut - any imperfections in the cut on one side should match the other side. The width of the slit should be as small as possible and very even - don't allow the slit to be wider at one end that the other as this will give different exposures and sharpness. A with of below 1mm is ideal. I estimated mine were about 0.2mm.
The next things to arrange are the shutter, which must be held open, and some mechanism to wind the film past the slit. For my early attempts I wound the film by hand using a home-made rewind crank of very exaggerated size.

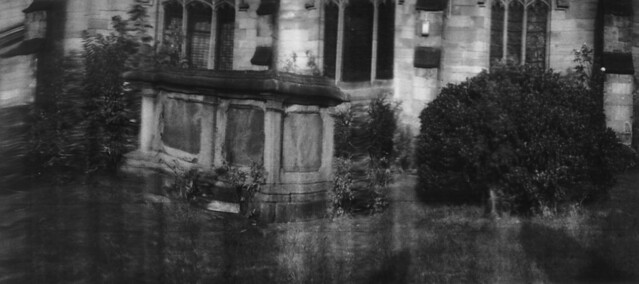
This works pretty well. The main disadvantage is the camera must be on a tripod. But there is something quite satisfying about winding and panning the camera with one smooth motion both about the same speed. Since most cameras have nasty wind-on locks and double exposure prevention devices, the technique I used was to shoot the whole film blank with a lens cap on the lens, then somehow arrange the shutter to be open (on B perhaps) with the rewind button pressed, and rewind and pan the camera simultaneously. Some photographs taken this way are almost normal.
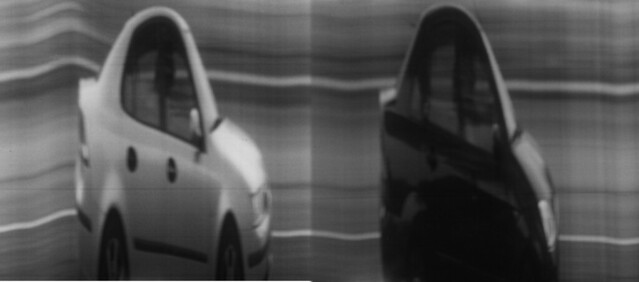
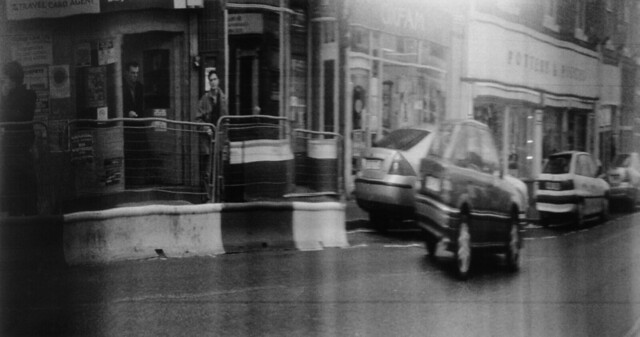
As an alternative to panning the camera, you can arrange the camera is still and the subject moves. That's how these two cars were shot.
The same principle is used commercially for cameras that take photographs of horses, greyhounds etc as they pass the winning post. Notice that as the camera is fixed the background is blurred in a characteristic "horizontal" way as the camera only sees a very thin slice of background repeated.
A combination of panning and taking pictures of moving objects can give surprising results. For example, one of the cars was moving here, making it appear much shorter than the car behind. In fact you can see both the front and rear of the car behind, with the car infront only covering the middle.
You'll find plenty of other very wacky photographs of this type on the web.
Conclusions and further developments
There are some problems with this method.
The exposure is governed by: the speed of the film as it goes past the slit and the width of the slit. It is quite easy to calculate that if the speed of the film is V mm-per-second and the width of the slit is W mm then the effective exposure is W/V seconds. For this to be something "sensible" like 1/100 the slit needs to be very narrow.
The slit should be narrow for another reason: the narrower it is the sharper the images will be. Sometimes the panning and the speed of film match exactly, and the images are unexpectedly sharp, but more often one gets slightly blurry images which may be good enough or not, depending on what you want.
I find it is difficult to cut any slit completely evenly, which accounts for the horizontal lines seen in many of my pictures. It is also difficult to wind film evenly, and unevenness in this accounts for vertical lines.
The slit does introduce the chance for the film to get scratched. In fact this is a minimal problem compared to the others, but it is a problem.
Finally, as I have described it, these cameras need a tripod.
On the other hand, these cameras have the advantage that the pictures they take are not limited to the width of a normal frame on 35mm film, but can be as long as you want. Panoramic photographs are very much possible.
I future posts I will give some other ideas that simplify the process and make the cameras easier to use. This involves perhaps using a motor to wind the film. There are also ways to simulate slitscans with a digital camera that can take video. You may also find that your camera's focal plane shutter already behaves as a slitscanner, or that your digital camera (especially phone camera) works so slowly it too behaves as a slit scan. Watch this space!
drink can tip ,helpful thanks
ReplyDeleteYou're welcome! cheers
ReplyDeleteOr maybe you should leave bigger gap and glue in the effective slit out of some unused razor blades. I will try your tehnique on my Smena, and will give you a feedback. Thanks :)
ReplyDeleteAnd regarding to slit movie, I have found a very useful Processing code on the net, to interchange one of the spatial dimensions (x or y) with time as dimension. Also cool effect :)
What processing code did you use for this?
DeleteWhat processing code did you use for this?
Delete