If photography is art, the qualities of the media used in the final print are as much part of that art as the subject. In fact I would go further - the subject and whatever it is provided it is looked at freshly with an interesting eye is not important for "art". One does not have to take a photograph of a pretty girl or a cute puppy for it to be art: in such cases these cutsie subjects are more likely to be distracting from the purpose of the image than complementing it.
So other methods for making a photographic image on paper must be explored by any serious photographic artist. Or so my humble opinion goes. I am only at the beginning of this exploration, but I hope to share some of it here, and some details of the experiments I made.
The gum bichromate process appeals to me for a number of reasons: one uses real-art paper, and real-art paints (watercolours). The choice of colour is available in a bewildering range, and it is even possible to layer several colours on each other. The theory is that the dichromate chemical when exposed to ultraviolet light, hardens many natural and artificial gum or glue-like substances, and this can be used as the basis for making a print from a negative. An introduction to gum-bichromate is available at The Alternative Photography site and this site has much more than I can say here. However my personal experiences may be helpful.
The recipe
The recipes I read on the web were mostly of the sort "take a dollop of this and a small amount of that..." and were too imprecise for anything but experiment, not that there is anything wrong with that, but some precision is needed to help make the process more predictable.
I took some "half-pan" watercolours, student grade from an art shop, and chose one (for the first attempt, the black) and cut it into half. It makes a very thick gummy cube, rather difficult to spread without water, but I really don't want to add too much water as it is the reaction between the dichromate and the gum that is important. Ideally, the watercolour should go in a dedicated pestle-and-mortar. You might be able to improvise some alternative holder, or use paint from a tube which is easier to mix but less concentrated.
I dissolved 13g of potassium dichromate crystals in 100ml of de-ionised water. They don't dissolve very easily: what I did was put the crystals and water in a bottle, put the top on, then immersed the whole thing under the hot tap, shaking occasionally, until it had dissolved. See warnings on dichromate below.
I took 6ml of gum arabic solution (from a bottle supplied by Windsor and Newton, available in art shops) and mixed it and pounded it with the water colour. Gum arabic is from the acacia tree and is also available as powder - you could dissolve this in (very little very hot) water and use this instead. My notes say to use 30g in 90ml water, though I didn't test this.
In a darkened room - with definitely no daylight though some tungsten light should be OK - I mixed the watercolour and gum mixture with 6ml of the dichromate solution. This made a thick watercolour paint which just covered a sheet of A2 paper, using a good soft flat brush. The paper was stored in the dark to dry, and when dry cut into small pieces as required. I used medium quality watercolour paper. The textures in the paper will remain and add to the print, though very smooth paper will show more detail.
Printing out
Like most printing-out processes, the best source of light is the sun, but a UV light (from a fluorescent tube or mercury vapour lamp) is possible. The negative is place on top of and in contact with the paper, and the whole sandwich is held tightly under glass. There are special frames to hold all this together. I found that even on a rather dull overcast day, 2-5 minutes was sufficient exposure. In bright sun it will be less. This is much less exposure than is needed for printing out using silver-based emulsions.
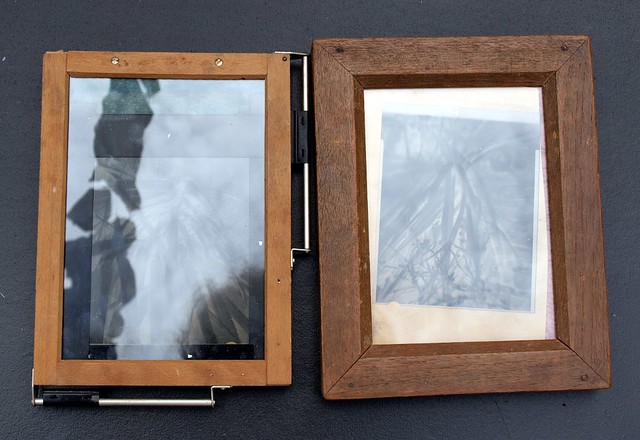
Special printing-out frames are available to allow you to check the process as it happens. If you have them (I did) by all means use them, but in this process nothing appears to be happening and it is pointless checking anything. You just have to do a trial, develop it, and modify the time for the second attempt.
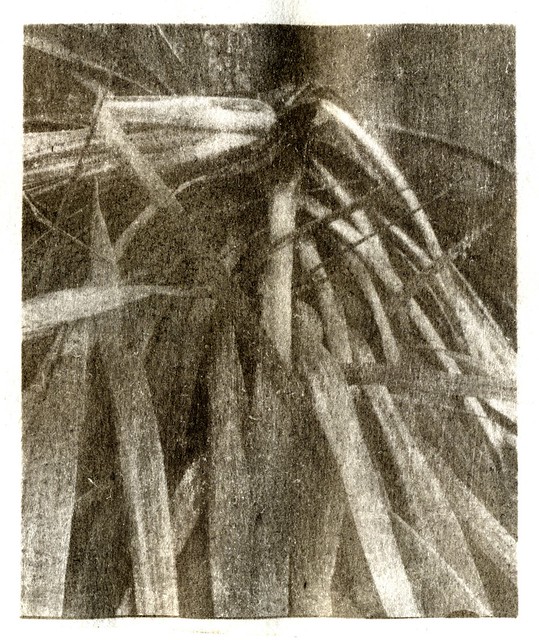
The UV light should have hardened the gum in certain areas of your paper, but as I said, at this stage nothing can be seen. To "develop" the picture you need to wash away the non-hardened gum revealing the white paper beneath. Run the paper gently under a stream of water from a tap for a minute of so. Then soak the paper image-side down in a tray of clean water for 5 minutes. Then change the water and repeat 2 times. I found that the paint needed some help to come away and I brushed the paper very lightly and evenly all over with the same soft flat brush I used for coating. When this works (and for me, it always worked, though some prints were better than others) it was wonderful to see how some paint comes away leaving the image.
After washing thoroughly (all of the orange dichromate colour should go) leave it to dry.
Warning
The gum and modern pigments are safe to use but dichromate is toxic and probably carcinogenic. When handling crystals or powder wear rubber gloves, eye protection and a face mask so there is no possibility of breathing in dust. When handling solution or prepared paper use rubber gloves. If you use containers to handle chemicals don't use them later on for food. If you think you may have accidentally touched something with chemicals wash in plenty of running water immediately.
No comments:
Post a Comment